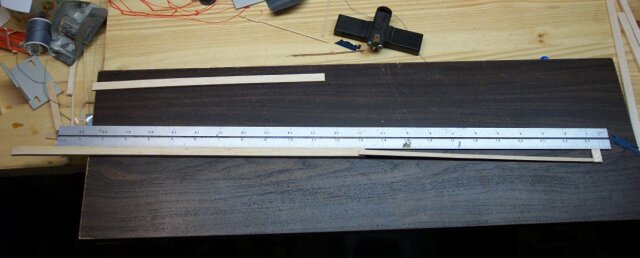
Then lay the body and boom
on the table and overlap them about 1/4".
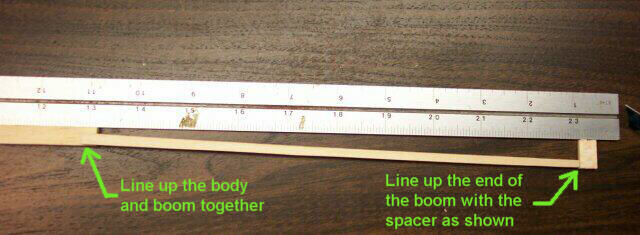
Use a straightedge to align
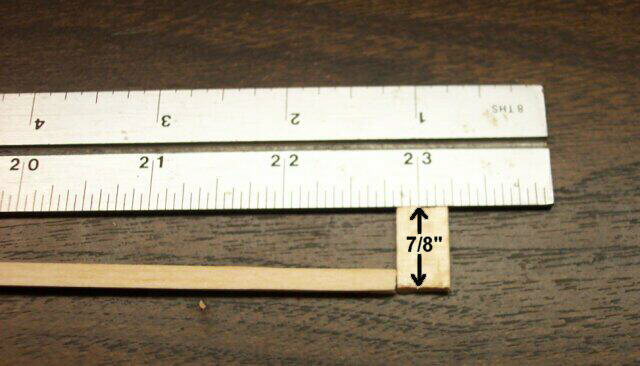
the body and boom together. Then cut a small piece of balsawood 7/8" long
and use it as a gage for aligning the tail boom. For the model to fly correctly,
the tail boom needs to be offset to the side a little to make it turn,
and up a little to help it fly correctly.
(Note: the body and boom
are actually upside down at this point of the assembly.)
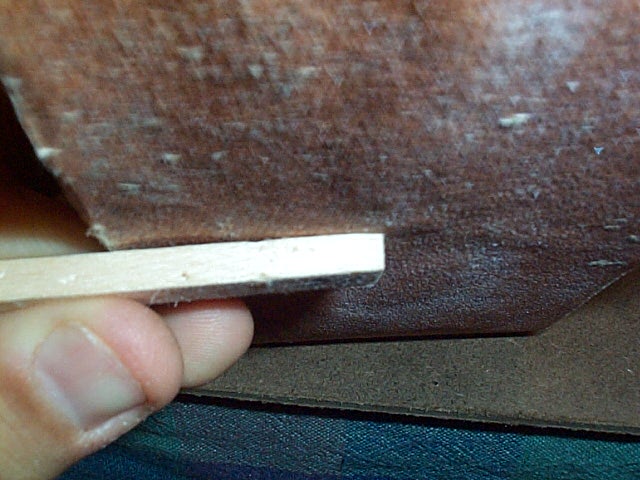
Set the boom up as shown
in the photos below.
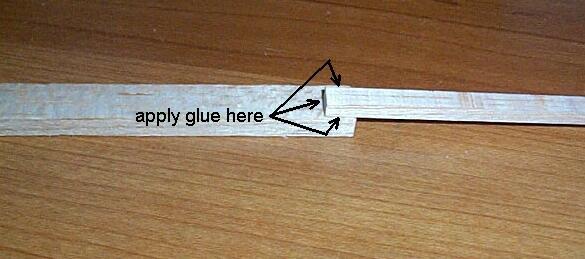
Now using a pin, apply small
drops of glue around the joint to glue the boom to the body.
As an alternate method you
can pick the boom up and place a small drop of superglue where the boom
was laying, then reposition the boom back onto the body. If you choose
this method, then you must position the boom quickly or the superglue may
dry before you have it positioned it correctly.
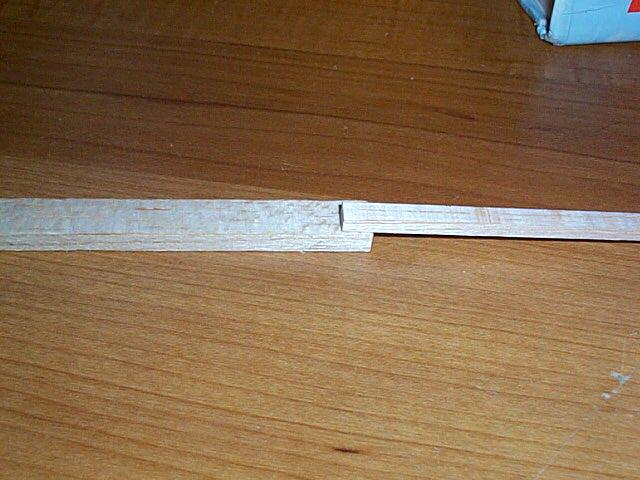
After the glue has dried,
the boom should look like this when viewed from above looking back. The
boom is intentionally offset like this to help the model circle to the
left.

Also notice that the boom
now points upwards.
